Introduction
If you’re a passionate musician or artist, having a dedicated space to create and express yourself is invaluable. Converting your garage into a music or art studio can be a fantastic way to achieve this. This article will guide you through the process of transforming your garage into a vibrant and inspiring studio where you can unleash your creativity. Let’s explore the steps involved in making this dream a reality.
Step 1: Assessing the Space
Before diving into the conversion project, take some time to assess your garage space thoroughly. Measure the area to determine the available space for your studio. Additionally, check with local authorities about regulations and permits required for garage conversions. Evaluate the existing structure for any repairs or modifications needed before starting the conversion.
Step 2: Planning and Design
Decide on the purpose of your studio and its specific requirements. Are you primarily a musician, painter, or sculptor? Allocate space for each activity accordingly. Create a floor plan and layout to organize the studio effectively. Consider aesthetics and interior design to make the space visually appealing and conducive to creativity.
Step 3: Insulation and Soundproofing
To ensure optimal sound quality and minimize disturbances, insulation and soundproofing are essential. Properly insulate the walls, ceiling, and floors to regulate temperature and block external noise. Implement soundproofing techniques, such as acoustic panels or heavy curtains, to keep sound from escaping the studio.
Step 4: Electrical and Lighting
Hire a licensed electrician to handle the electrical aspects of the conversion. Identify the power needs for your equipment and ensure there are enough electrical outlets in the right locations. Adequate lighting is crucial for your studio, so plan the lighting setup carefully to create an inviting and well-lit space.
Step 5: Flooring and Acoustics
Choose suitable flooring material that complements the activities in your studio. For instance, hardwood floors work well for dance studios, while carpeting might be preferred for music spaces. Enhance acoustics by strategically placing sound-absorbing materials, ensuring your studio produces the best sound possible.
Step 6: Ventilation and Climate Control
Proper ventilation is vital to maintain a comfortable and healthy environment in your studio. Install ventilation systems to improve air circulation and prevent humidity buildup. Additionally, consider climate control options like air conditioning and heating to keep the space conducive to work throughout the year.
Step 7: Sound Equipment and Instruments
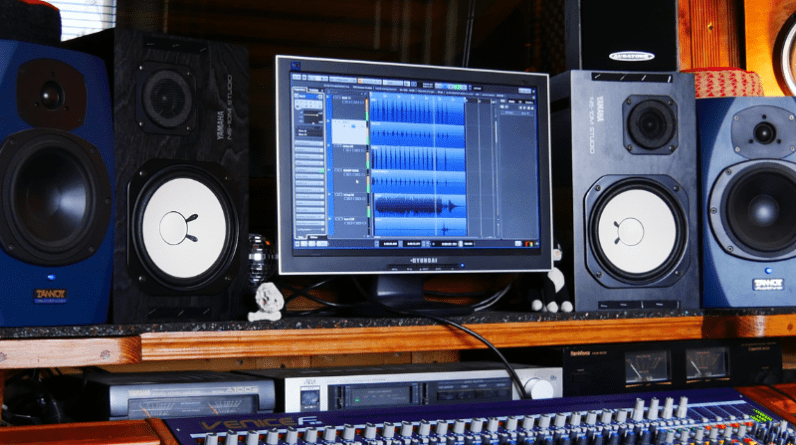
Invest in high-quality sound equipment that aligns with your creative needs. Whether it’s musical instruments, recording gear, or painting supplies, make sure everything is well-organized and easily accessible in your studio.
Step 8: Furniture and Storage Solutions
Select furniture that is functional and comfortable for extended periods of creativity. Ergonomic chairs and workstations are essential for maintaining good posture and preventing fatigue. Integrate efficient storage solutions to keep your studio organized and clutter-free.
Step 9: Inspirational Decor and Artistic Touches
Infuse your personality into the studio by adding inspirational decor and artistic touches. Hang your artwork or favorite musical posters, display sculptures, or install unique lighting fixtures to create a captivating ambiance that reflects your artistic spirit.
Step 10: Testing and Fine-Tuning
Before fully settling into your studio, test the equipment and sound quality. Fine-tune the setup to achieve the best possible sound and functionality. Make adjustments as needed to ensure a seamless creative process.
Promoting Creativity and Productivity
To maintain a productive atmosphere, implement practices that boost creativity in your studio. Dedicate time for regular artistic sessions, experiment with different techniques, and seek inspiration from various sources.
Benefits of a Garage Studio Conversion
Converting your garage into a studio offers several advantages. It is a cost-effective alternative to renting a separate studio space, saving you money in the long run. Additionally, having a studio at home provides convenience and easy accessibility to your creative space whenever inspiration strikes.
Challenges and How to Overcome Them
While converting a garage into a studio can be exciting, it comes with its challenges. Limited space and resources might require creative solutions. Soundproofing and noise control can also be tricky, but with careful planning and the right materials, these challenges can be overcome.
Conclusion
Transforming your garage into a music or art studio is an enriching and fulfilling project for any creative individual. The process may require time, effort, and creativity, but the results are undoubtedly worth it. Having a dedicated space for your artistic endeavors will nurture your talents and allow you to create freely. So, get started on your garage conversion journey and unlock the full potential of your creativity.
FAQs
- Is it expensive to convert a garage into a studio? Converting a garage can be cost-effective compared to renting a separate studio space, but costs will vary based on your requirements and the extent of the conversion.
- Do I need a permit to convert my garage into a studio? Depending on your location, you may need a permit for a garage conversion. Check with your local authorities to ensure you comply with regulations.
- How can I soundproof my garage studio effectively? Implementing soundproofing materials like acoustic panels and heavy curtains can significantly reduce noise leakage from your studio.
- What is the best flooring option for a music studio? Hardwood floors are popular for music studios due to their acoustic properties, but carpeting can also work well for certain musical activities.
- Can I convert a small garage into a functional studio? Yes, even a small garage can be converted into a functional and inspiring studio space with proper planning and organization.


